Diving into the world of digital art doesn’t mean leaving behind the tactile beauty of traditional mediums. In fact, digitising your watercolor artwork can open doors to new creative possibilities. From prints to digital portfolios, turning your watercolor masterpieces into high-quality digital files is a skill every modern artist can benefit from. Don't worry about the kind of paint though. The process is the same, no matter if you draw with watercolor, acrylic or gouache - or any other medium.
Let’s walk you through the process.
1. Preparation of Your Artwork
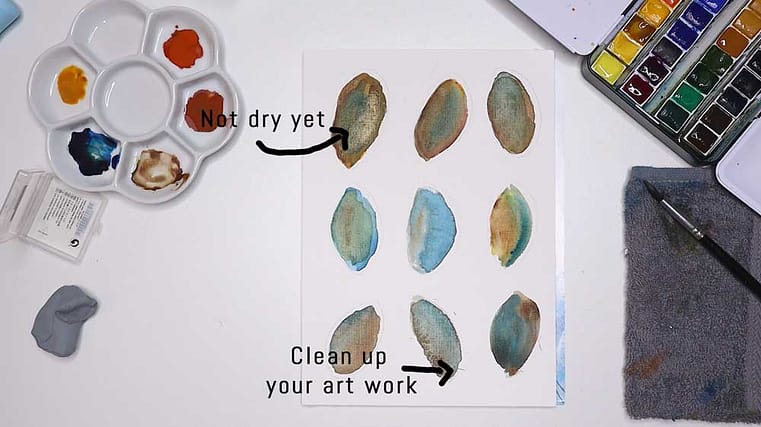
Before anything else, ensure your artwork is completely dry. Even a slight dampness can affect the scanning process. Clean up any stray marks or dust particles on the paper to ensure a clear scan. In my course "Create and sell Watercolor Wall Art as a downloadable File" I show you the exact material you need to clean up and prepare your artwork properly.

2. Choosing the Right Scanner
Not all scanners are created equal. For watercolor artworks:
Don't worry too much though. Most probably your scanner has all these requirements and more. The most important requirement is the resolution. The higher the resolution the higher is the size of the artwork you can sell. In my class I scan my artwork in 1200 DPI and with that high resolution I make sure that I can offer my customer different ratios of the artwork. You can have a look at my artwork here so you know what ratios we also create in the class.
In case you don't have a scanner you can also take a picture with your camera or mobile phone. The only issue here is that your mobile or camera might not be precisely over your artwork. But in case you can handle that and have some lighting around you can go with that as well.
Because nearly every printer today has a scanner included we focus in my class on scanning your artwork in a high resolution.
3. Scanning Your Artwork
Beside the fact that your artwork lies straight on the scanner bed another huge advantage of scanning is that you don't need to worry about the right light. And, last but not least, you can most probably select different resolutions.
Here is a quick instruction:
4. Software Enhancement
Once you have scanned your artwork there are several software options available for enhancing scanned your file:
- Adobe Photoshop: A popular choice, offering a range of tools for color correction, sharpening, and more. In my class I walk you through the process using Photoshop because I believe it's the best software for this work. You can use it for free for 30 days, just download it from the Adobe Website.
- GIMP: A free alternative to Photoshop with a comprehensive set of editing tools.
- Corel PHOTO-PAINT: Part of the CorelDRAW suite, this is another excellent tool for photo editing.

Since I'm a Photoshop-Girl I cover only Photoshop here at Digidesignresort. I also use Procreate and Adobe Illustrator but you most likely will never see me using GIMP or Corel Photo-Paint. This doesn't mean that the programs are bad, it's just my personal preference.
5. Adjusting Levels and Colors
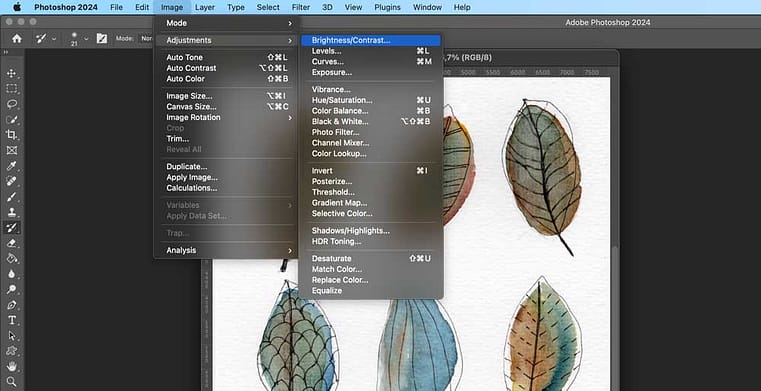
Even the best scanners may not capture the exact colors of your artwork. Each software allows you to adjust levels and colors.
Using your chosen software:
- Adjust the brightness and contrast levels to match the original artwork.
- Play with the color balance if the scan has color shifts.
- Use the sharpness tool to enhance any details that may have become soft during scanning. But use this tool carefully because it might influence the overall look of your artwork if not used correctly.
6. Removing Unwanted Backgrounds or Noise
Zoom into your artwork to spot any noise or unwanted marks:
- Use tools like the healing brush in Photoshop to remove small imperfections.
- If there's a consistent background color you want to remove, use the magic wand tool or background eraser. This task is a bit more tricky and required several steps. In this step by step guide we just talk about scanning an artwork and not unhinge an element from the background.
7. Saving and Archiving
Once you’re satisfied:
- Save the enhanced version as a TIFF or JPG to retain maximum quality.
- For sharing on web or email, you can save a copy in JPEG format but then you need to decrease the size of your file to about 1000 px to make sure it is not that big.
- Always keep a backup of the original scan.
Digitising watercolor artwork is a blend of technicality and creativity. While the above steps offer a guideline, feel free to experiment and find a process that works best for your unique style. Remember, the goal is to capture the essence and beauty of your original artwork in a digital format.
If you are interested in this process as well as drawing in Watercolor have a look at my class. You can get it as a standalone class but also watch it as part of the Safari Lounge Designer Classes.
Have a look!

Create and sell Watercolor Wall Art
Let's draw a watercolor artwork together and then digitise it. Once done we create different ratios and prepare it for sale. It's great fun!
