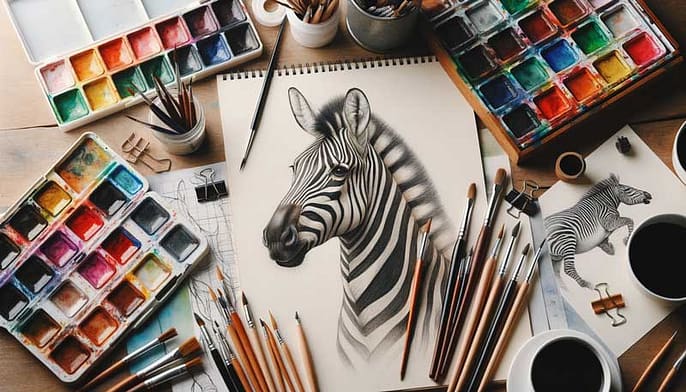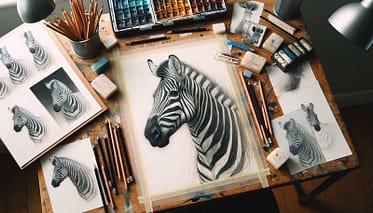
Animal sketches, when done right, capture the essence and beauty of the wild. These sketches can depict the graceful curve of a deer's neck, the fierce eyes of a lion, or the majestic stripes of a zebra. But how do artists achieve such realism? The key lies in understanding animal anatomy and using reference images to guide the sketching process. In this blog post, we'll explore techniques for producing lifelike wildlife sketches.
Sketches can be done in so many different styles. You don't have to strive for realism. In case you wanna draw illustrations for children's clothes you'd hardly draw something realistic. But no matter what
you go for you definitely should use a reference image to capture the anatomic of your animal correctly. It's really hard to do that from your imagination!
1. Selecting the Right Reference Image
Whether you're using an image from the internet or your own stash, it's crucial to choose a high-quality photo. Look for images with good lighting that show the animal's anatomy clearly. Additionally, different angles can provide unique perspectives, so gather multiple images if possible.
In this case you don't need to worry about copyright. After all you are not creating nor selling a copy of the image you've gathered from the internet. Actually you put it next to your drawing, create your very own image and you do that not as a photo but with e.g. watercolor or digitally on your iPad.

2. Breaking Down the Image
Before diving into the sketch, study the reference image. Note the animal's proportions, muscle placements, and unique features. Break the image down into simpler shapes to guide your sketch. For instance, a zebra's body can be seen as a combination of rectangles and ovals.
Start by drawing those. Draw the body and then the head, add its legs and then we go into more detail.
3. Beginning with a Light Sketch
Using a light pencil, start sketching the basic shapes you've identified. This preliminary sketch acts as a guideline. Don't worry about details at this point; focus on getting the proportions and angles right.
If you draw digitally this is even easier because you can simply create a new layer once you want to go into more detail and, later on, you just delete your sketch layer entirely.
4. Adding Details
Once you're satisfied with the basic sketch, you can begin adding details. Observe the reference image closely. Notice the texture of the animal's fur, the placement of the eyes, and other intricate details. Use varied pencil strokes to capture these nuances.
Also, your first sketch doesn't have to be your final drawing. I usually start by just sketching here aren there different parts of the animal and then I slowly put it all together.
5. Understanding Animal Anatomy

While reference images are invaluable, understanding animal anatomy will elevate your sketches. Knowing where muscles are located and how they move can make your sketches more lifelike. Books, online courses, and zoology studies can be excellent resources.
See on the sketch on the left the zebra's legs and the muscles there as well as the stripes in detail. You can also use your traditional drawing and digitize it for sale. In case you are striving for that you should consider to join the Safari Lounge Designer Classes!

Safari Lounge Designer Classes
Learn everything you need to know to build a sustainable Business for Printable Products. Let's create together, plan your business together, and market your products. It's all there,
personal coaching included! In case you just wanna have fun - that's inside as well!
FREE 7-Days Trial
6. Finalizing with Inks or Colors
After completing the sketch, you can finalize it using inks or colors. If you're aiming for a realistic look, watercolor is an excellent medium. It allows for layering and blending, which can replicate the nuances in an animal's fur or feathers. This works in both, traditional or digital drawings.
7. Continuous Practice
Like any art form, continuous practice is crucial. The more you sketch, the better you'll become at capturing the essence of the animal. Over time, you'll rely less on reference images and more on your understanding of animal anatomy.
In conclusion, sketching wildlife with realism is a rewarding endeavor. By understanding animal anatomy, using reference images wisely, and practicing regularly, artists can create breathtaking sketches that capture the spirit of the wild.
If you don't wanna draw...
Just in case you don't wanna draw your own graphics but still create something beautiful from them you always have the option to buy commercial use graphics. I've picked one of my favorite sets, it's super cute!

I sometimes think I have many styles I like. While I love drawing realistically I also enjoy working with abstract art and this naive nearly childish style because it suits so many different needs!
I know this is a totally different style than the hand-drawn zebra above but I really like the simple style. In case you wanna make patterns for clothes I think the simple drawings are the better option. They are perfect for kid's cloth but also for home accessories.
No matter what you go for you can create something from the beautiful graphics you create yourself or have created for you.
